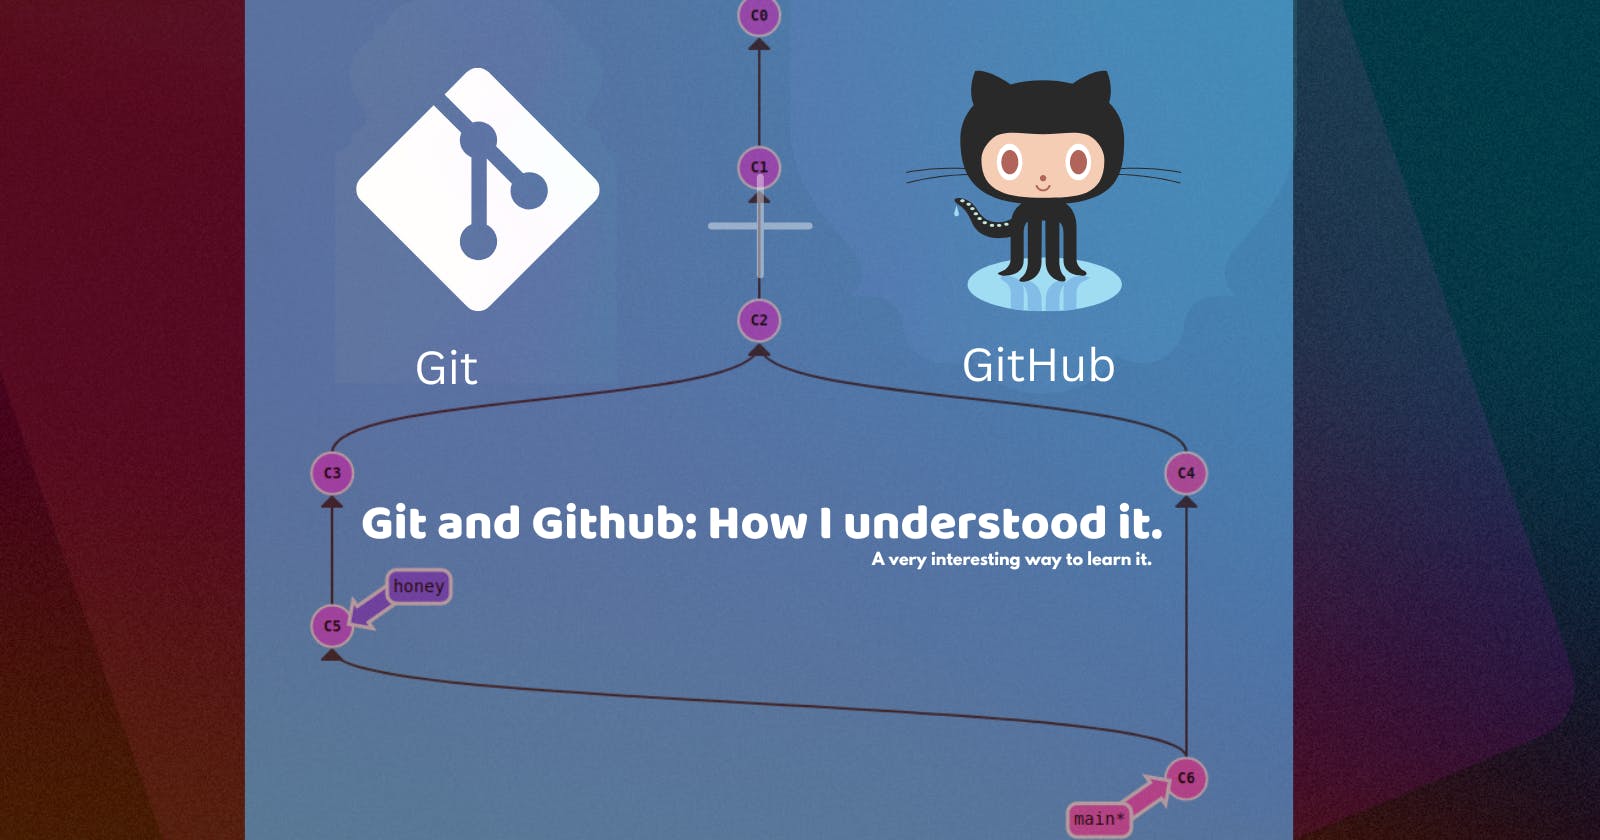
Git and GitHub: How I understood it (Part 1).
The way I understood Git and GitHub was a very interesting one and it feels quite effective to me. So, I will be sharing that in this blog.


What are Git and GitHub?
Are you one of those who always used to think that Git and GitHub are the same things? Then welcome to the club. I was also one of those but then I started reading about it as everyone out there is talking about how important both of them are. I researched and got to know both their usage and the difference between them.
Git: Git is software (version control system) for tracking changes in any set of files, usually used for coordinating work among programmers collaboratively developing source code during software development. Its goals include speed, data integrity, and support for distributed, non-linear workflows.
In layman's language, it is software which ensures that if something goes haywire while making changes to your codebase/files instead of you losing everything you can just roll back and get your a** saved. For eg: Git is like a notebook which comes with an inbuilt whitener/eraser which can you use in case of any outages and go back to a safe version.
GitHub: It is in the simplest form a web-hosting service specifically for Git repositories*. Also, you got all the git DVCS commands and some additional features too. You can push, pull, view and make changes to your hosted git repository and also do collaborative work with others on a single one.
Repositories*: Repositories in GIT contain a collection of files of various versions of a Project [1].
Resources I used:
Kunal Kushwaha (DSA Playlist): youtube.com/watch?v=apGV9Kg7ics&list=PL.. (One of the cleanest and quick tutorials for GitHub).
CodeWithHarry (Git and GitHub Playlist): https://www.youtube.com/watch?v=evknSAkUIvs&list=PLu0W_9lII9agwhy658ZPA0MTStKUJTWPi (Detailed explanation/tutorial in Hindi).
JavaTPoint: javatpoint.com/what-is-github (Articles on GitHub, if you prefer reading).
Learning Git Branching : https://learngitbranching.js.org/ (Best way to visualize a git repo/branches by using commands)
Advantages of Git/GitHub:
1. The major advantage is Rollback the code to a working previous state, this is gonna save you a lot of space, time and effort.
It provides you security as it is Distributed system and also the flexibility to work from anywhere you want. You don't have to carry all the files with you.
Enhanced collaboration, is to be one of the most vital aspects of GitHub. People around the globe contribute and participate in an efficient collaborative manner by using just a few commands.
Nowadays, It's not a choice to use Git/GitHub you have to do it. It is one of the easiest ways to prove your work by showcasing your work through your GitHub profile.
Last but not least the core feature of why people use online/cloud-based services is the Backup. You can simply access your work or safeguard your work even when your laptop suddenly started to act like a weirdo or it got damaged.|
Requirements:
Terminal with Git already installed: git-scm.com/downloads
Some basic knowledge of Linux commands.
Sikhne ki ikcha (willingness to learn).
Git commands:
So, while teaching Kunal Kushwaha gave a very interesting example and relate it with the commands. I will talk about it and explain all the basic commands which can simply get you started with Git/GitHub.
To use git commands you have to first install git in your local machine, which you can easily search and do. if you want me to tell you then sorry I won't it's quite an easy task so khud kro.
- All the history that has been saved is stored in another file that Git provide us which is the ".git" file. To initialize a git and get an empty git repository we use this command :
git init

An empty git repo has been initialized. From now on any changes made in this folder/ repo will be picked up by Git and will be updated in the ".git" file.
So from here, our example starts: Assume this Git repo as a Reception ceremony. Yes, a reception ceremony feels weird right but stays with me for a while and it will all make sense.
- The second command after running "git init " is to check what's the status of your git directory. To check the current status of your git repo/directory we use :
git status
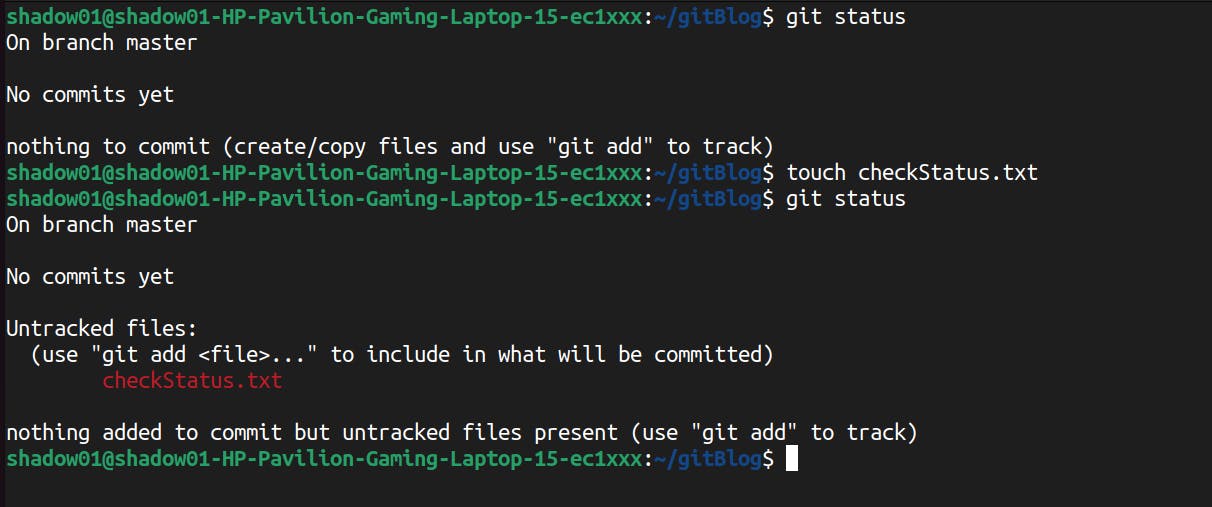
git status: This command tells you what all changes have been made in your git repo which has been untracked or needed to be added in the actual repository to add it to the version tracking system. As you can see in the above image there was nothing to commit/track before as there were no changes made but as soon as I created a file the status changed and now it is asking me to add (which is also a command) this change to the system.
Analogy: Simply like, in every reception ceremony there is a stage full of people taking pictures with the bride(Dulhan) and groom(Dulha). The cameraman has to take care of who all have already clicked the picture and who is left. So we can understand this as a staging area behind the stage where people come and gather before going to the stage.
- After you have made some changes and checked that the 'git status' command is showing some things that need to be added. You will then have to use 'git add' command.
git add checkStatus.txt
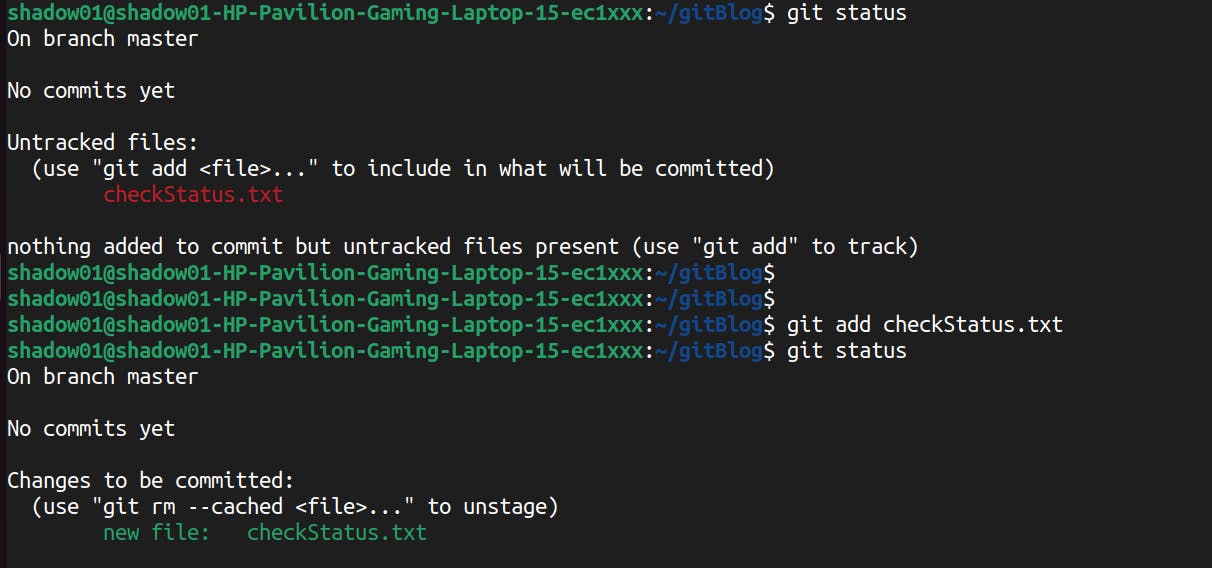
git add: This command will put every change you made(like a new file created, changes made in code, or delete some files) into the directory. You will still not be able to see the changes in your directory in GitHub(BitBucket or GitLab) but it has now been tracked. You can either give the actual filename or use '.' to select all at once.
Analogy: Now after using this command, some or all of the people from the staging area are now in the stage getting ready for their pictures to be clicked.
- After you have added the changes and it has now been tracked, you will now commit it or to be precise execute the changes to be applied in your directory. To commit anything to your repo/directory you will use the 'git commit -m "commit message" command.
git commit -m "docs: test file added"

git commit: This command updates the directory and makes the change permanent. Not permanent but yeah you can now commit it and it has been saved in history.
Analogy: Now you can understand this as the picture has been clicked now and it has been saved with the cameraman. Till now all the activities haven't been tracked but the cameraman has now clicked it and it's saved in his chip (memory card).
- If you want to check, that all changes have been made in your repo/directory you can simply check the 'git log'. As, we already know what a log is, if not then let me tell you a log is a piece of wood shaped mostly in the form of a cylinder (JK). A log is an accumulation of changes made in your database/file/repo.
git log
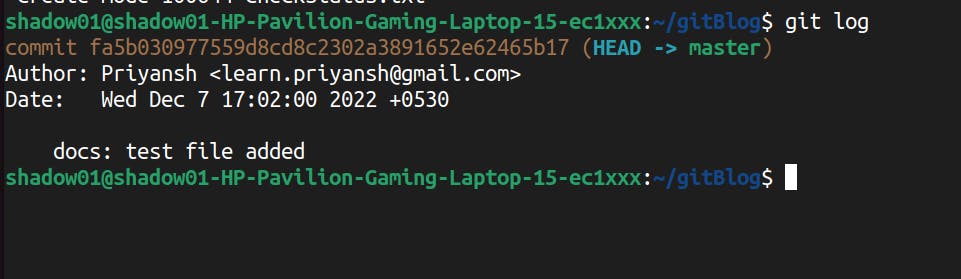
git log: You can see that the changes made have been shown in a specific format.
Analogy: This is all the photos that have been framed in a Marriage photo album. It contains all the pictures that have been clicked in the reception and approved by all and then became a part of the marriage photo album.
commit ID: The ID attached to your commit, as it is a version control system has to have some ID attached to it to roll back (that's common sense).
Author: Basically who did it? Who created a new file or updated an old one?
Date: Obviously
commit message: Again quite obvious.
Note: Don't worry about (Head -> master) we will look into it in the GitHub part. although it's a git component but still there it will make more sense.
- What if we add a wrong file by mistake, we have to have something for that too right? Don't worry Git has got you covered. So, in case you made some changes and add it all in the tracking list (used the git add command) but now don't want to commit it. Here comes your saviour 'git restore --stagged [filename]" command.
git restore --staged .
Let me show you by using this command and sharing the outputs:
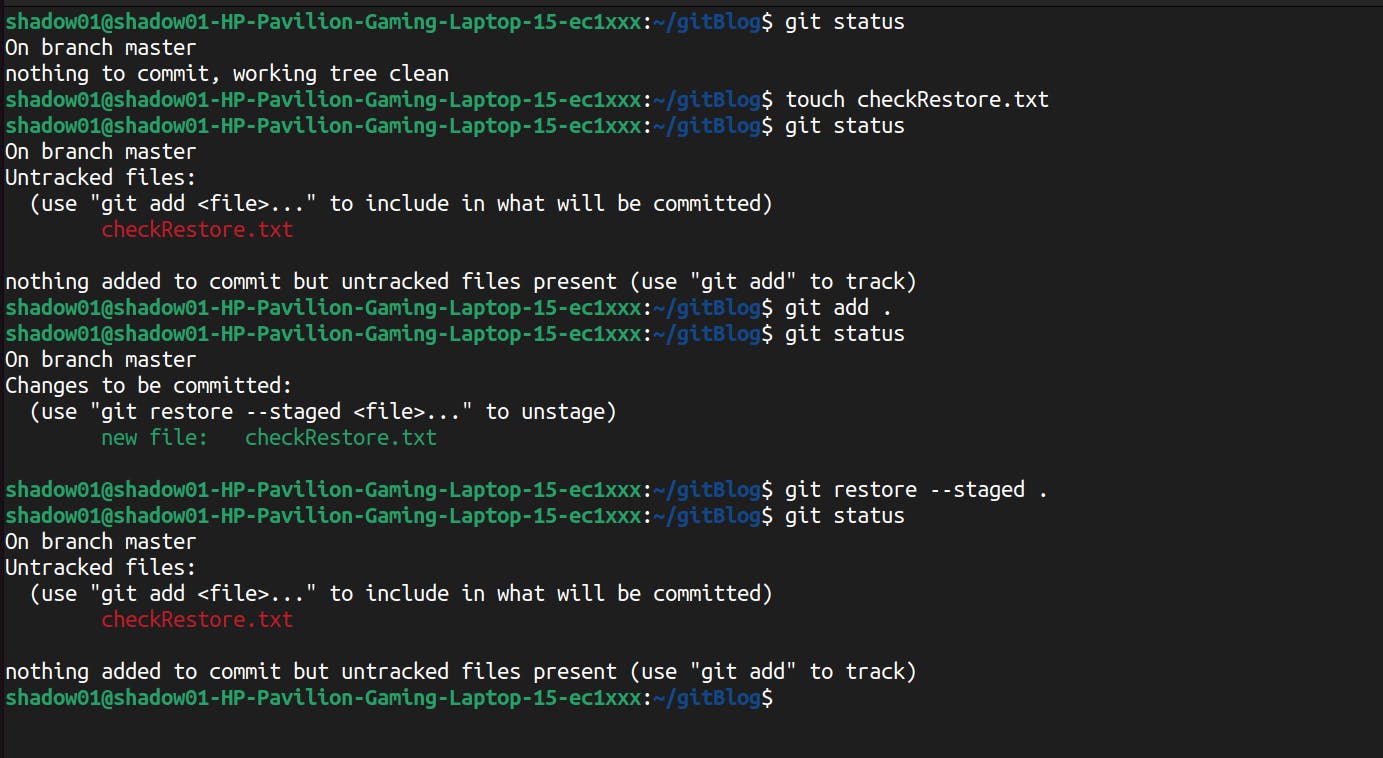
As you can see there are no changes made recently. 'git status' command says nothing to commit. Then I created a file using touch (you can also use vim/vi/nano but first install it on your PC) named checkRestore.txt. After creating it I again checked 'git status' and now it is showing one change made and it is untracked. Now, I use the 'git add .' command and add it to the trackable/staged files. As you can see yourself it is so intuitive that it is suggested us if you want to upstage the file use this command. Then, I used the same command and you can see the file which was previously added to the staged area has now been unstaged.
Now, last but not least what if you made a wrong commit and now you want to delete a commit? Here lies a bit of a problem, as you cannot delete any commit from the middle as I show you every commit has a commit ID attached to it and it is built on top of another commit just like a stack (if you don't know stack then simply understand it as a pile of chairs one above other). To remove a specific commit you have to have its commit ID with you.
Note: If you delete a specific commit from the middle every commit above it will be removed and the operations they performed will be sent back.
Let me show this also with the outputs:
- Here I have created several files/updated some files and also committed them. Now the last commit before this commit was the one I did in the previous operation. So, now I will be deleting the middle commit and show you all the changes made right now will be removed and again come to the staging area ready to be committed. BTW I will use the 'git reset' command for this:
git reset commitID
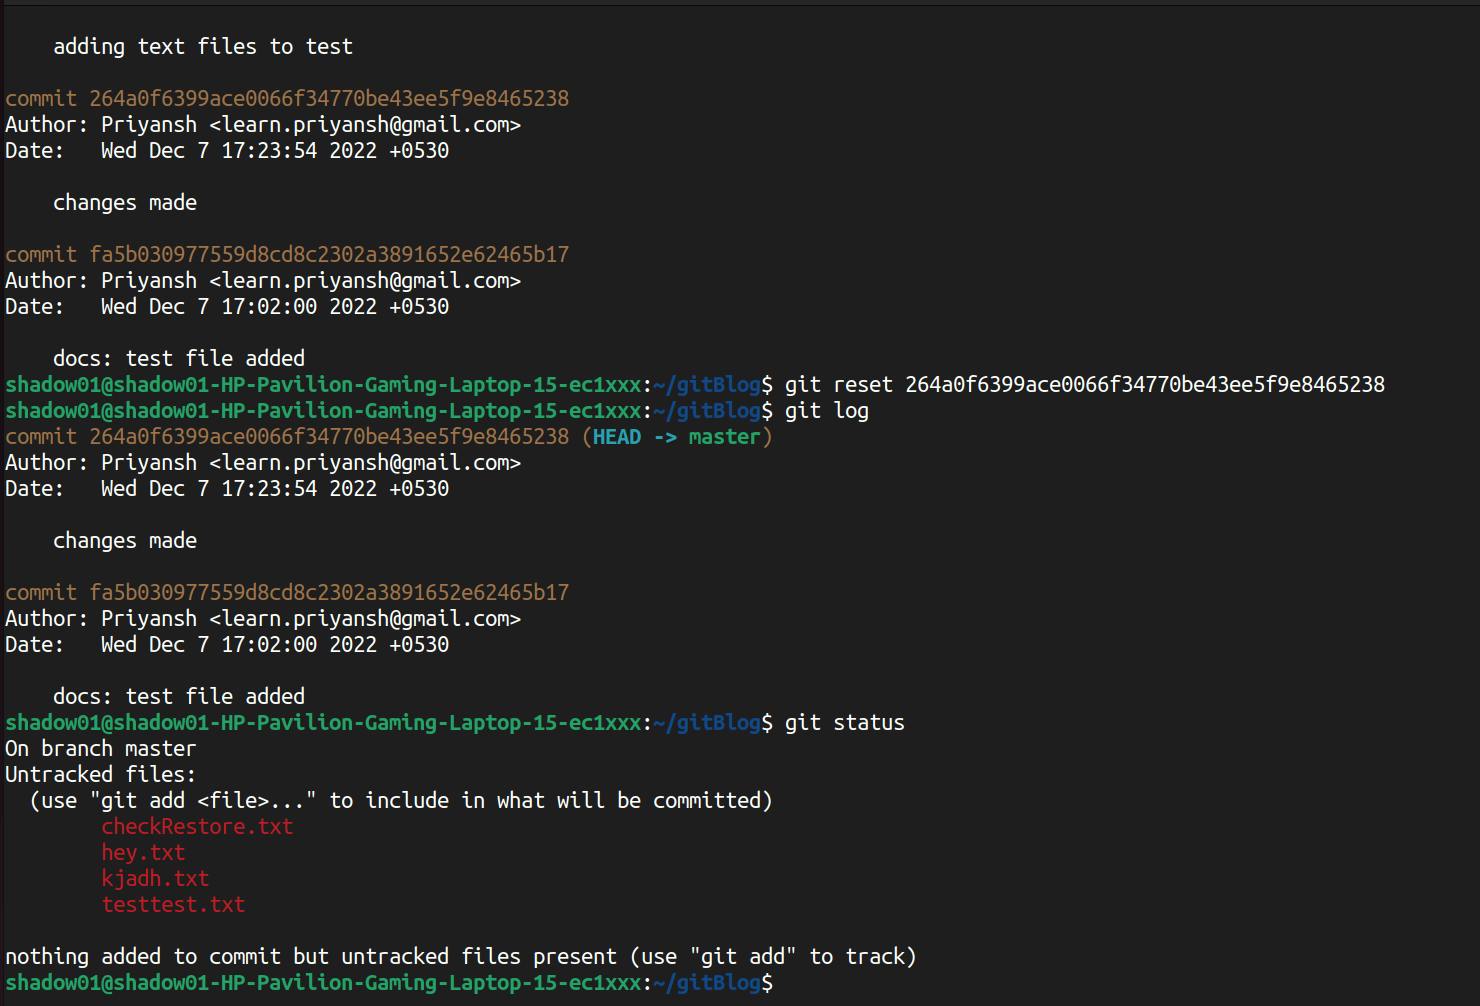
Now you can see, that the commit made above the second commit has been gone. All the changes now have again been sent to the staging area.
Analogy: In the first 'git restore' command you can understand it like some people came to the stage and were not properly standing or you don't want to get a picture with them. So, you simply asked your camera vale bhaiya (cameraman) to not click any picture or ask them to come back in some time.
For the second one, you clicked the picture with them but now you don't want it in your photo album. So, you simply ask the cameraman to not add that to the photo album but keep it with you in a digital form.
Bonus command:
git stash - If there are some commits you don't wanna delete and keep them somewhere for the future need. You can use this command and it will go from the staging area somewhere out of the ceremony hall. If you want to commit the files again you can use 'git stash pop' or if you want to clear the stash stack you can use the 'git stash clear' command.
There are a lot more git commands and even more git concepts but this is enough to get you started with git. Also, in this article, I have not talked about GitHub. I will write a separate article about it. Don't worry it will be a short one, although there is no guarantee of that :)
I hope you liked ❤️ this article and if you have made it this far big thumbs up to you. It's quite a big one but I hope it added some value or make you at least interested in learning Git and GitHub.